Last updated: August 16, 2026
Deer processing starts the moment the animal is down, not when it reaches a processor or your own kitchen table. The choices you make in the first few hours, how quickly you field dress, how fast you cool the carcass, and how carefully you handle it during transport, matter as much for food safety as anything that happens later with a grinder or a cure.
This guide walks through the field-to-freezer sequence: field dressing, cooling and hanging temperature, the deboning and cutting stage, and the decision between processing it yourself or taking it to a processor.
Quick Answer
What does deer processing actually involve?
- Field dress promptly and avoid cutting into the intestines or other internal organs, since that is the main early source of contamination.
- Cool the carcass to below 40°F as soon as possible, ideally within a few hours if air temperature is above 45°F.
- If hanging longer than a day, keep the carcass consistently between 35°F and 37°F rather than relying on cold outdoor air alone.
- From there, deboning, cutting, grinding, and any curing or sausage-making follows the same core principles as processing any other meat.
Deer Processing: Step by Step
This table lays out the sequence from field to freezer and what matters most at each stage.
| Step | What matters most | Why |
|---|---|---|
| Field dressing | Avoid puncturing intestines or organs | Reduces the risk of E. coli, Salmonella, and other pathogen contamination early on |
| Cooling | Get below 40°F, ideally within 3 to 4 hours if air is above 45°F | Slows bacterial growth before the carcass reaches a processor or your own cooler |
| Hanging | Hold at 35°F to 37°F if hanging more than a day | Extended aging above 40°F risks spoilage rather than improving quality |
| Deboning and cutting | Work clean and cold, trim thoroughly | Reduces contamination risk and removes tissue you would not want in the final product anyway |
| Grinding, curing, or freezing | Follow the same standards used for any raw meat | Venison carries the same fundamental food safety considerations as beef once it reaches this stage |
Field Dressing: The First Safety Decision
Field dressing removes the internal organs promptly after the animal is down, and doing it carefully is the first real food safety decision in the whole process. The main goal is avoiding punctures to the intestines, stomach, or bladder, since content from those organs is a primary source of the bacterial contamination that can end up on the meat if it is handled carelessly. Working with clean hands and a clean knife, and getting the organs out reasonably promptly rather than leaving the carcass intact for hours, both reduce that risk meaningfully.
Once the animal is field dressed, getting the carcass cooling as soon as realistically possible becomes the next priority, which leads directly into the cooling and hanging stage below.
A folding saw carried in the pack handles the pelvis and sternum without the weight of a full butcher saw. Our bone saw guide covers where a field saw stops being enough and a shop saw starts paying off.

Cooling and Hanging Temperature
University extension guidance is specific here: cool the carcass to below 40°F as soon as possible, generally within about 3 to 4 hours if the air temperature is above 45°F. If you plan to hang the carcass for more than a day, which many hunters do for aging and quality reasons, keeping it consistently between 35°F and 37°F is the range extension sources recommend, rather than assuming cold fall air alone will hold a safe, steady temperature. Aging above 40°F is not recommended, since that range favors bacterial growth rather than the flavor and tenderness benefits people are usually after when they age meat.
This is also where the DIY-versus-processor decision often comes up. A commercial cooler gives more reliable temperature control than an outdoor pole or garage, particularly during an unseasonably warm stretch of hunting season, which is a real consideration if your local weather does not cooperate.

Deboning, Cutting, and Grinding
Once the carcass has cooled properly, learning how to debone a deer follows many of the same principles as breaking down any other animal: working clean, keeping the meat cold, and trimming silverskin and connective tissue thoroughly, since venison has less internal fat than beef and any trim left behind is more noticeable in the final product. This stage is where venison processing really becomes hands-on, and taking it slow the first time matters more than speed. A manual or electric grinder built for home use handles ground venison and burger mix well, and many hunters blend in a percentage of fat, often from beef, since venison itself is quite lean and benefits from added fat in ground products and sausage.
If you plan to make sausage or cured venison products from your harvest, our guide on cure #1 vs cure #2 covers which curing salt applies to fresh sausage versus longer dry-cured products, since venison sausage making follows the same curing rules as any other meat.
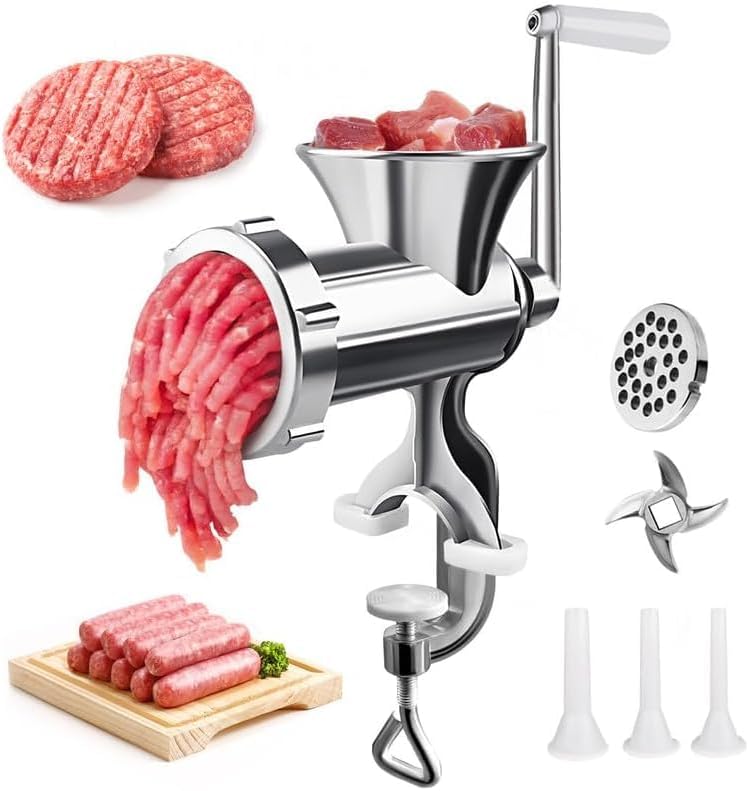
Grinder capacity is the usual bottleneck once trim starts piling up, and a grinder sized for a whole deer turns an evening of work into an afternoon.
Transport and Getting the Carcass Cold
The gap between the kill site and a cooler, whether that is a processor’s walk-in or your own setup at home, is often the least controlled part of the whole timeline, especially on a warm early-season day. Field dressing quickly, propping the body cavity open to help air circulate, and getting the carcass into shade or a cooled vehicle as soon as possible all help close that gap. If you are transporting on ice, keep the meat itself from sitting directly in standing meltwater, since prolonged contact with water is its own quality and contamination concern separate from temperature.
Longer drives home from a hunting trip deserve extra planning specifically because of this gap. A cooler with enough ice to hold a safe temperature for the actual length of your drive, checked and topped off along the way if needed, is worth the extra effort compared to hoping a shorter, colder-than-expected trip works out.
DIY Processing vs a Professional Processor
Processing your own deer gives you full control over cuts, fat content, and what becomes sausage versus steaks, and it is a realistic project with basic equipment and a clean, cold workspace. A professional processor, on the other hand, offers consistent cooler temperatures, experienced handling, and can be the more practical choice during a busy or unusually warm stretch of the season, or if you lack a reliable cold space to hang and work in.
Neither choice is inherently safer than the other when done correctly; the deciding factors are usually your available equipment, cold storage, time, and comfort level with deboning and cutting an animal yourself. Storage after processing is the same either way, and our guide on what is freezer burn covers the packaging habits that keep venison in good shape through the months ahead.
Common Mistakes in Deer Processing
- Leaving the carcass intact too long before field dressing. Delaying organ removal gives bacteria more time and opportunity to spread before the carcass even starts cooling.
- Assuming cold outdoor air is a substitute for a reliable 35°F to 37°F hang. Fall weather can swing warmer than expected, and outdoor temperatures are not as controlled as a cooler.
- Skipping the fat trim and assuming it will just cook off. Venison fat has a strong flavor most people find unappealing, and it is easier to trim before freezing than to deal with later.
- Grinding venison with no added fat at all. Extremely lean ground venison can turn dry and crumbly; many processors blend in beef fat for exactly this reason.
- Not deciding on cure or seasoning choices before the animal is down. Sausage and jerky plans are easier to execute when you know your approach before processing day, not mid-cut.
Frequently Asked Questions
How quickly do you need to cool a deer carcass? Extension guidance recommends getting it below 40°F as soon as possible, generally within about 3 to 4 hours if the air temperature is above 45°F.
What temperature should you hang a deer at? If hanging more than a day, keep the carcass consistently between 35°F and 37°F. Aging above 40°F is not recommended.
What is the biggest food safety risk during field dressing? Puncturing the intestines, stomach, or bladder, since organ content is a primary source of bacterial contamination if it reaches the meat.
Should you process your own deer or use a processor? Both can be done safely. A processor offers consistent cooler temperatures and experienced handling, while DIY processing gives you full control over cuts and fat content, provided you have reliable cold storage and a clean workspace.
Why is fat often added to ground venison? Venison is very lean on its own, and blending in a percentage of fat, often from beef, improves texture and prevents ground venison and sausage from turning out dry.
Can you make sausage or jerky from venison the same way as beef? Yes, the same core food safety principles apply, including proper curing salt use for sausage and a heat step before dehydrating for jerky.
How do you keep venison cold during a long drive home? Pack it on enough ice to hold a safe temperature for the full length of the trip, keep the meat from sitting directly in standing meltwater, and check the ice level along the way on longer drives.
Should you process a deer yourself or hire it out? Both are workable choices. Processing a deer yourself gives you full control over cuts and fat content, while a processor offers consistent cooler temperatures and experienced handling when time or cold storage is limited.
The Bottom Line
Deer processing safety is decided early: careful field dressing, prompt cooling below 40°F, and a steady 35°F to 37°F hang if you are aging the carcass. From there, deboning, grinding, and any curing follow the same standards as processing any other meat, whether you handle it yourself or hand it off to a processor.
See the field-to-freezer steps